
Local WordPress development with Laravel Valet on MacOS

Laravel Valet is a development environment for macOS and configures your Mac to always run Nginx in the background when your machine starts, and then, using DnsMasq, proxies all requests on the *.test domain to point to sites installed on your local machine.
It is a blazing fast development environment that uses roughly 7 MB of RAM, it's very minimalistic and without a GUI (although we will see at the of the article how to use a GUI).
"Valet is a Laravel development environment for Mac minimalists. No Vagrant, No Apache, No Nginx, No
/etc/hostsfile. You can even share your sites publicly using local tunnels. Yeah, we like it too."
Prerequisites
So in order for this to work we need some tools installed:
- Homebrew
- Composer
- WP-CLI (optional)
- MacOS (of course)
Installing HomeBrew
Homebrew is a free and open-source software package management system that simplifies the installation of software on Apple's operating system, macOS, as well as Linux. The name is intended to suggest the idea of building software on the Mac depending on the user's taste.
/bin/bash -c "$(curl -fsSL https://raw.githubusercontent.com/Homebrew/install/HEAD/install.sh)"
Installing Valet
To get started, you first need to ensure that Homebrew is up to date using the update command:
brew update
Next, you should use Homebrew to install PHP:
brew install php
After installing PHP, you are ready to install the Composer package manager. In addition, you should make sure the ~/.composer/vendor/bin directory is in your system's "PATH". After Composer has been installed, you may install Laravel Valet as a global Composer package:
composer global require laravel/valet
Finally, you may execute Valet's install command. This will configure and install Valet and DnsMasq. In addition, the daemons Valet depends on will be configured to launch when your system starts:
valet install
Once Valet is installed, try pinging any *.test domain on your terminal using a command such as ping valet.test.
From now on, Valet will automatically start its required services each time your machine boots.
How to serve websites
The park command registers a directory on your machine that contains your applications. Once the directory has been "parked" with Valet, all of the directories within that directory will be accessible in your web browser at http://<directory-name>.test:
cd ~/Sitesvalet park
That's all there is to it. Now, any application you create within your "parked" directory will automatically be served using the http://<directory-name>.test convention. So, if your parked directory contains a directory named "laravel", the application within that directory will be accessible at http://laravel.test.
So right now, you can download a WordPress install using WP-CLI (or download a copy from the download page) and navigate to http://<directory-name>.test you will see the 5-min WordPress install.
But there is one more thing you need to run your local website...
Databases
Laravel Valet doesn't come with a database service but you can easily run a mysql service with two ways:
via Homebrew
You can install MySQL easily using Homebrew by running:
brew install mysql
And start the MySQL server by running:
brew services start mysql
You can connect to your database with a GUI tool at 127.0.0.1 using the rootusername and an empty string for the password.
From now on your Mac will re-start MySQL at reboot. In case you want to stop this behavior (and also stop MySQL) you can run
brew services stop mysql
With DBngin
DBngin provides a free, all-in-one database management tool that includes MySQL, PostgreSQL, and Redis. After DBngin has been installed, you can connect to your database at 127.0.0.1 using the root username and an empty string for the password.
PHP Versions
Valet allows you to switch PHP versions using the valet use php@version command. Valet will install the specified PHP version via Homebrew if it is not already installed:
valet use [email protected]
By default, Valet uses your global PHP installation to serve your sites. However, if you need to support multiple PHP versions across various sites, you may use the isolate command to specify which PHP version a particular site should use. The isolate command configures Valet to use the specified PHP version for the site located in your current working directory:
cd ~/Sites/example-sitevalet isolate [email protected]
To revert a site back to Valet's globally installed PHP version, you may invoke the unisolate command from the site's root directory:
valet unisolate
Securing Sites With TLS
By default, Valet serves sites over HTTP. However, if you would like to serve a site over encrypted TLS using HTTP/2, you may use the secure command. For example, if your site is being served by Valet on the laravel.test domain, you should run the following command to secure it:
valet secure laravel
To "unsecure" a site and revert back to serving its traffic over plain HTTP, use the unsecure command. Like the secure command, this command accepts the hostname that you wish to unsecure:
valet unsecure laravel
I'm not a terminal type of user, is there a GUI?
By default, Valet doesn't come with a GUI and all of the commands are given via a terminal, but I get, not everyone is comfortable with terminal commands or it's just some times you need to do something fast.
Nico Verbruggen has created an amazing lightweight macOS menubar app called PHP Monitor to effortlessly manage PHP and Valet services. It provides a GUI to manage PHP versions, locate config files, stop & start Valet services and shows helpful information about your setup.
You can run the following commands to install PHP Monitor:
Warning!
You have to install Valet first for PHP Monitor to work.
brew tap nicoverbruggen/homebrew-cask
brew install --cask phpmon
After that you can find the app at your MacOS Launchpad.
If you get a message says that Brew has not not been added to sudoers.d, run the following command:
sudo valet trust
And voilà:
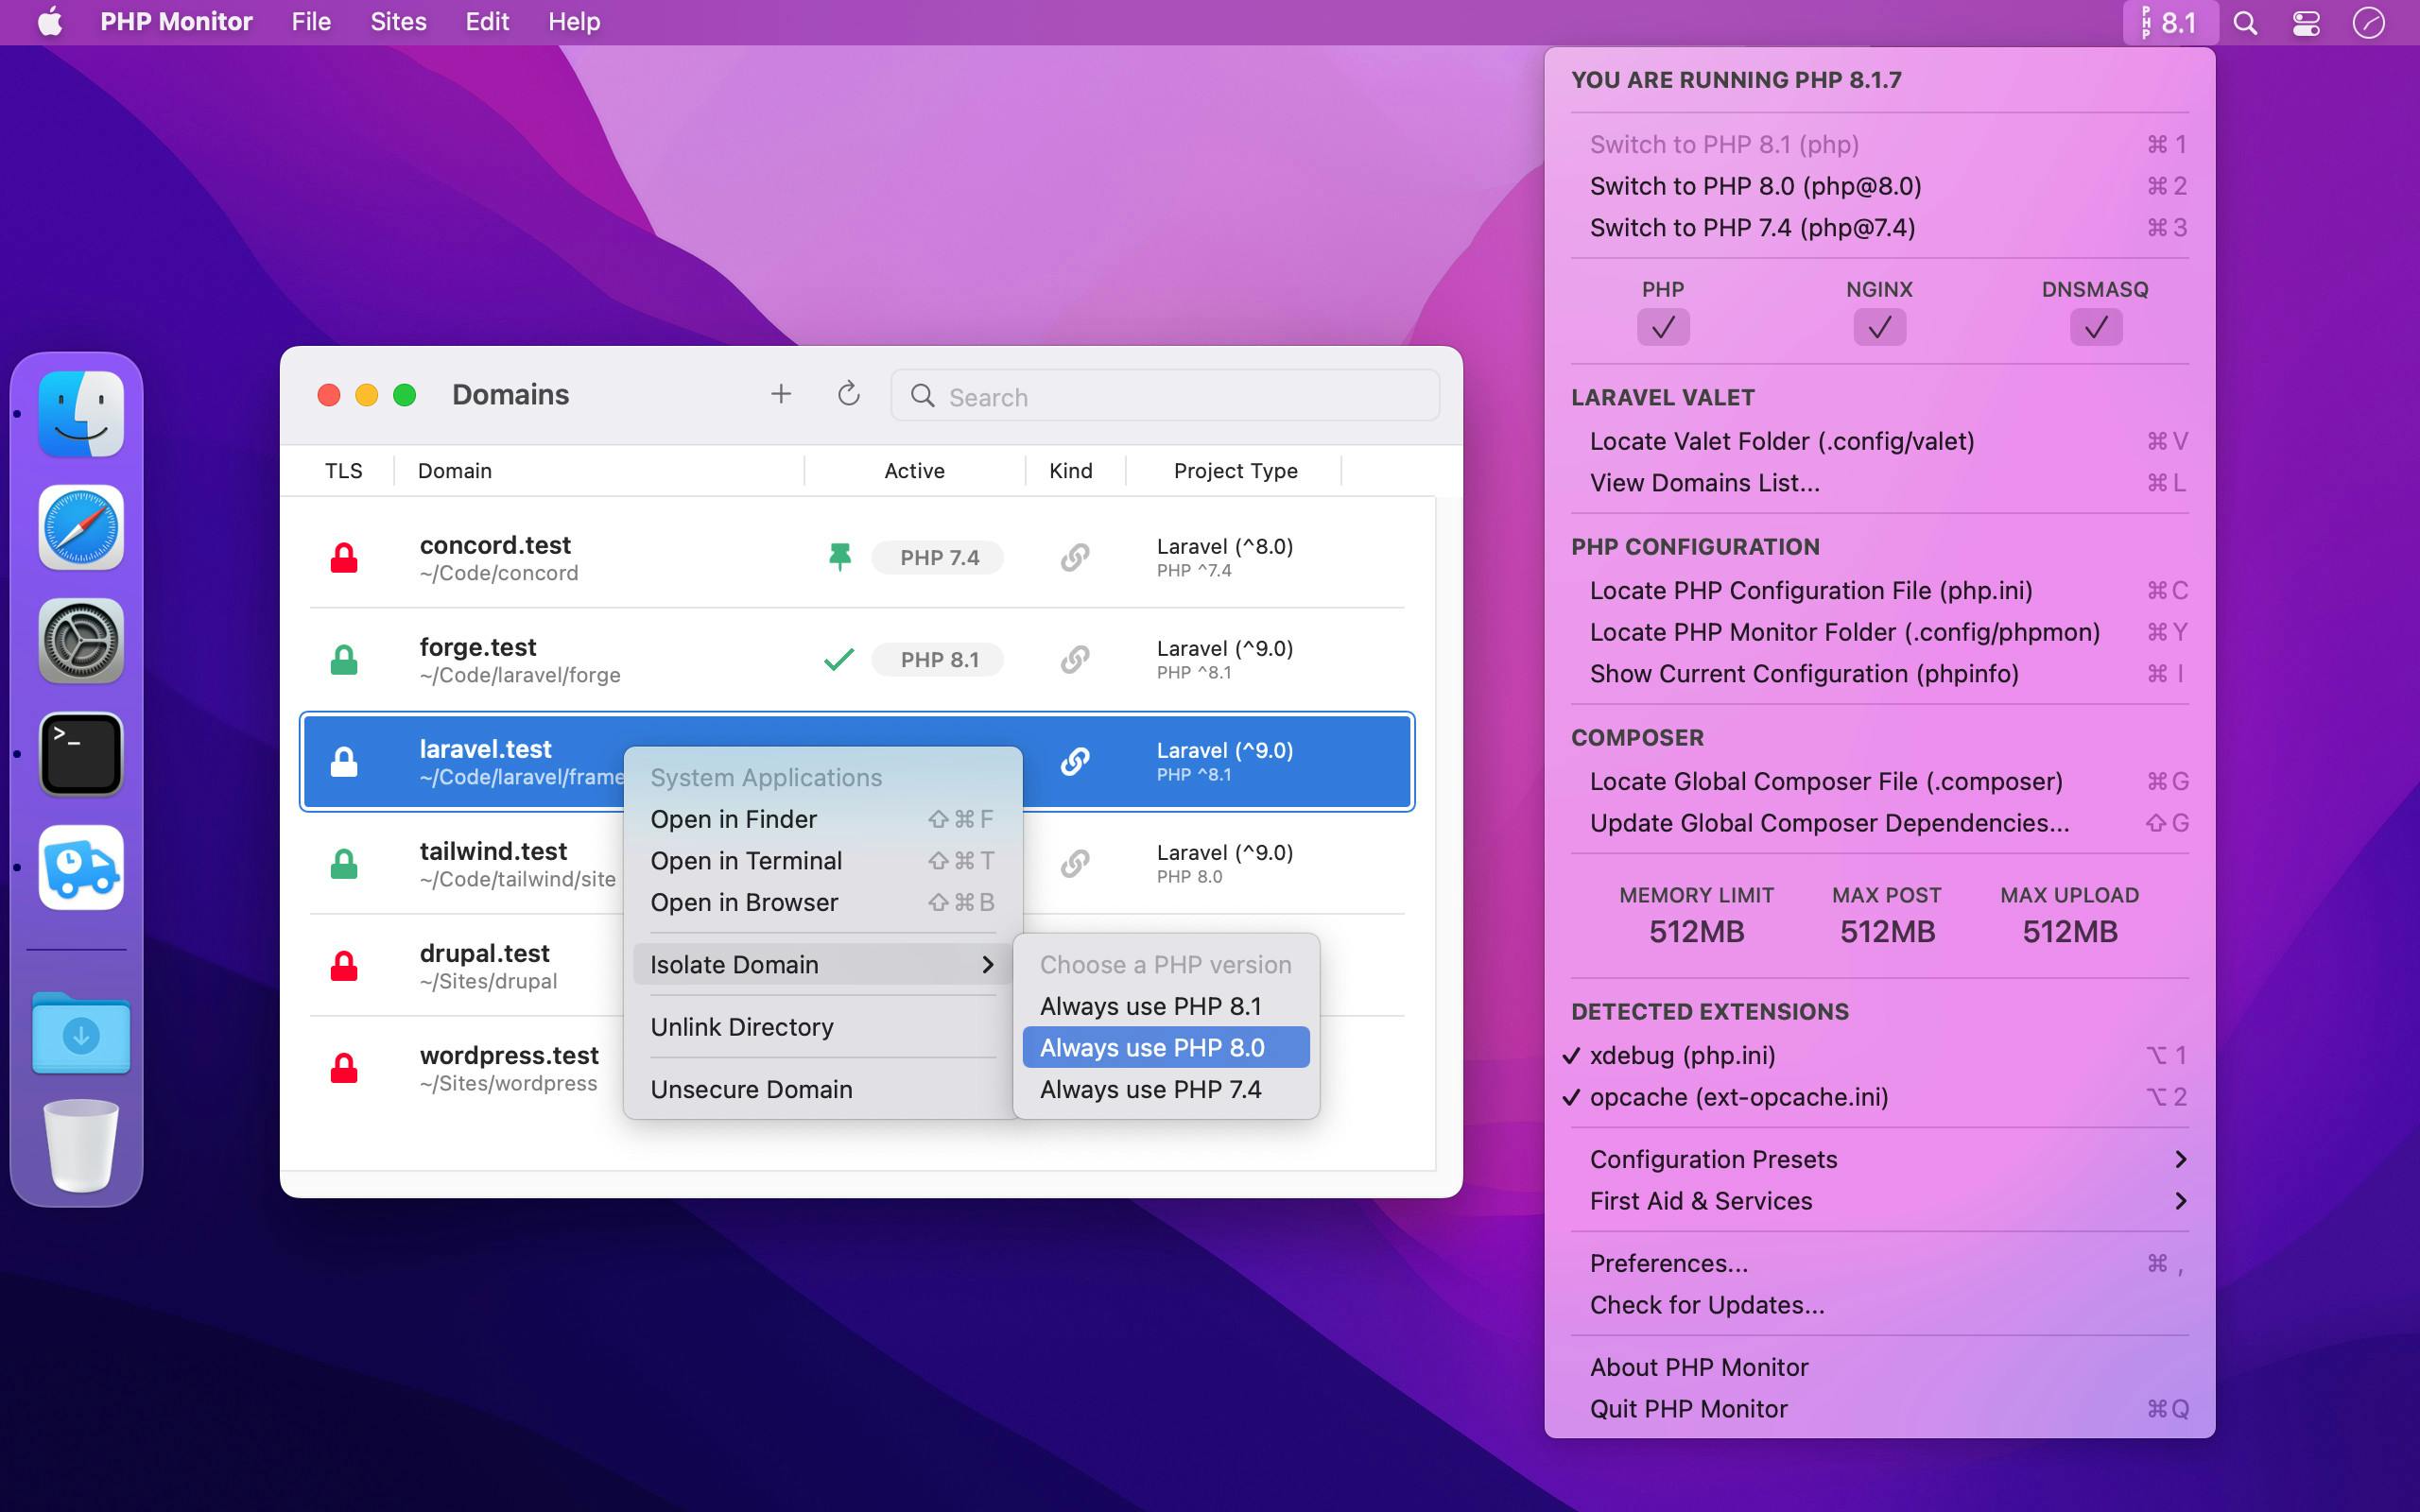
Image from PHP Monitors' Github repo.
If you want PHP Monitor to start up when you boot your Mac, you can do it by dragging PHP Monitor.app into the Login Items section in System Preferences > Users & Groups for your account.
So this is it! You can now start developing locally your next WordPress (or Lavarel) project. If you have any thoughts I will be glad to hear them in the comments bellow, or mention me at my Twitter handle @kosvrouvas.